Have you ever seen the sun in full 360° ?
Now there’s a cheap and easy way to create your own spherical model of the sun for a small exhibition or even just for fun at home.
The exhibit will be able to show a full 360° model of the sun’s surface by using data collected by three NASA-Satellites at the same time.
DIY Instructions
You need:
- 180° fisheye-lens (order here)
- Laser projector, small (order here)
- Sphere, Ø 12 – 15 cm, acrylic or glass (like this)
- Paper roll, 27 × 9 cm (like this)
- Box cutter
- Scissors
- Pen
- Laptop (with HDMI output)
- Decor foil (optional)
-
Spray can, magic white (optional, like this)
| While building the exhibit, run the movie generator! |
|---|
| Follow the instructions on our GitHub page to prepare the content that is going to be displayed on the sphere. While downloading the data, there’s enough time to build the exhibit. |
Step 1: Gather supplies

Get yourself the right material to work with. We recommend you order our suggested material to be fully sure you get the right outcome. If you’re already in possession of similar material or have new ideas, feel free to try it your own way!
And by the way, if you order our suggested paper roll, you can even enjoy a nice müsli before starting. :-)
| Note: |
|---|
| It is important that a laser projector is being used for this project, as the image of the sun won’t be sharp otherwise. |
| The hole of the sphere cannot be bigger than the paper roll’s diameter and cannot be smaller than the fisheye-lens! |
Step 2: Get your sphere ready

If you’re using a transparent sphere like we do, you have to be very careful to cover its complete surface with the spray can. The result should be an even layer of transparent white.
Now let the sphere dry (about 15 minutes) and continue with the next step.
| Note: |
|---|
| Spray with quick pace to avoid too many drips on the sphere. |
| Make sure you do the spaying outside and cover the area around the sphere! |
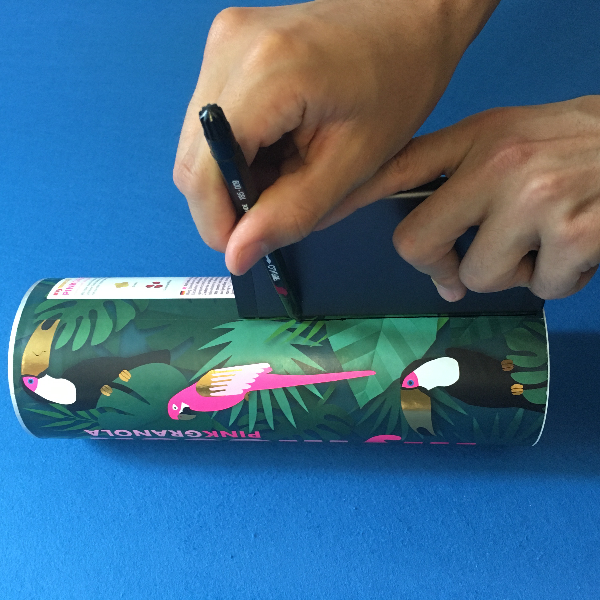
Step 3: Measurement

Now you need to remove the plastic cap of the top side of the paper roll. Mark the cutting area by using the bottom circle of the fisheye-lens. Be sure to position the lens right in the middle of the cap.
You have to do the same thing with the paper roll. Make sure you mark the cutting area in the size of the laser projector’s width and start from the bottom of the roll.
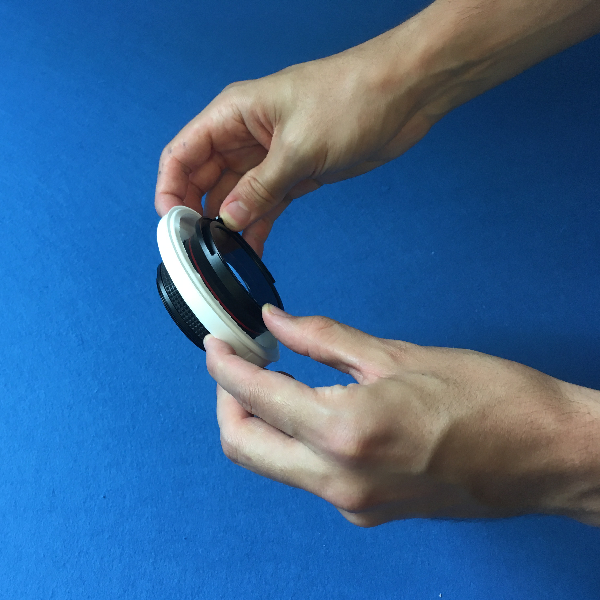
Step 4: Cutting

Now cut both marked areas.
Personally, we like to use a box cutter for more precision, especially for the circle on the plastic cap.
When done correctly you should be able to insert the projector perfectly (but not loose!) in the gap of the roll and the bottom part of the fisheye-lens in the plastic cap like this:
Step 5: Style it

This part is totally optional but we think it’s worth it.
With the use of decor foil you can give your exhibit a clean and professional look.
Cut out the right amount of foil so that you can cover the whole surface of the roll. Make sure that you add about 3 cm extra room to cover the edges.
| Tip: |
|---|
| To get nice and soft edges you need to cut some lines in the decor foil. Then you can simply fold them inside the roll. |
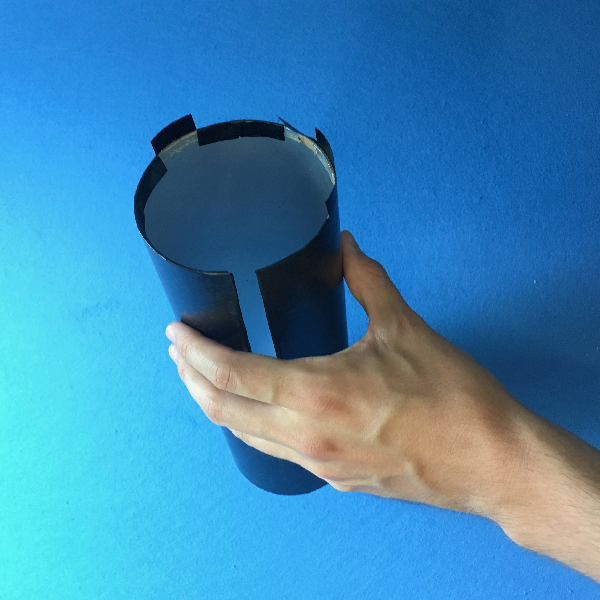
Step 6: Adjustments (almost done!)

Put the plastic cap with the Fisheye-Lense in it back on top of the paper roll. Also stick the projector through the gap and put the sphere on top of the roll over the lense.
Once everything is ready, connect the projector to the video source. Make sure the projector is adjusted correctly so that the whole sphere is lighted by its projection.
| Note: |
|---|
| Watch out that you don’t look directly in to the projection while the sphere is not attached! |
The Sun in a Sphere
Now turn off the lights, start the projection and enjoy your private sun exhibit!
